Showing posts with label Scrapbook Studio. Show all posts

Tuesday, September 17, 2013

Challenge no.21 - Washi Tape and Twine at SCRAP AFRICA

Ooooops, I am 2 days late in posting about this challenge. It has been SO hectic around these parts of late that my lil ole blog has been terribly neglected!

Anyway, a quick post before I go and start supper to share my take on the latest SCRAP AFRICA challenge - WASHI TAPE & TWINE!

There is a lovely prize from the Scrapbook Studio, and a random winner will win this gift voucher.

http://www.scrapbookstudio.co.za/

a certificate for 250 Rand (approximately 25USD), which can be used by foreign participants as well.

You have until the 30th September to upload your projects.

What an AWESOME prize!!! SCRAPBOOK STUDIO is one of my fave places to shop, Cariena stocks LOADS of wonderful products!!!

When you are done with your project link up at the SCRAP AFRICA blog.

Can't wait to see what you put together!!!

Thursday, October 25, 2012

A simple card with the SEPTEMBER DT kit from SCRAPBOOK STUDIO!!

Hello, I am back today with my last tutorial for SCRAPBOOK STUDIO, and this time it is a card!!!


STEP 1:
I use a piece of white cardstock included in the kit and my Martha Stewart Score Pad to score a line down the centre of the card.


STEP 2:
I cut strips of paper using the various different patterned papers included in the kit.


STEP 3:
I trim them in varying lengths and adhere them to the white base in a bit of a staggered pattern.


STEP 4:
I cut a 4cm strip of blue paper, and keep it at a length of 30cm. I score a line at every ¼”. 


STEP 5:
I fold along every score line in a zig-zag pattern. 


STEP 6:
I then manipulate the paper into a rosette shape. The paper tends to jump around a bit, but just be firm with it!!


STEP 7:
Stick the two ends together with some double sided tape.


STEP 8:
I use a large glue dot to secure the centre of the rosette.


I added some punched stars, and a little bit of machine stitching. I also punched two different sized circles to add to the centre of the rosette. I finished it off with the “hello” sentiment and some green ink around the edges.


There were so many yummy goodies included in this kit, if you would like to order it (or more info on the kit), email Scrapbook Studio at this address: sales@scrapbookstudio.co.za with September DT kit in the Subject Line.

SCRAPBOOK STUDIO is really my fave place to shop, I am not just saying that because I am on their DT, but it's because they stock a wide range of lovely goodies at great prices, and they give awesome service. Please take the time to stop by the shop HERE.

Friday, October 12, 2012

A Gift Box Tutorial for Scrapbook Studio

Hi all, today I am back with a Gift Box tutorial for Scrapbook Studio, I really hope you like it!!!


STEP 1:
For this tutorial I decided to do something completely different from my previous tutorials. I grabbed a tin that has been lying in my drawer for ages, and decided to make a gift box. This tutorial will work with any box, you would just need to adjust your measurements accordingly!


STEP 2:
I took the measurements of the base of the tin, and of the lid. In my case the measurements of my box were: Base 3.3cm (I cut this the width of the 12x12 cardstock) the top of my box measures 10.2cm x 15.4cm.


STEP 3:
I cut the strips and the piece for the top. I used my very trusty (and well loved) Crop-A-Dile Corner Chomper by We R Memory Keepers to round the corners of the top piece. 


STEP 4:
I use double sided tape on the top and around the sides of the box to secure the pieces of cardstock.


STEP 5:
I use a border punch by EK Success to cut a masculine diamond strip to add a decorative touch to the base of the box. 


STEP 6:
I secure the border strip with a very thin double sided tape.


STEP 7:
I cut another rectangle of paper, this time in the lovely red houndstooth paper included in the kit. I size it smaller than the original navy piece. This can be any size you would like, if you prefer more of the red, don’t size it down as much as I did. I also cut 2 mini cards from the gorgeous “cheer ‘em on” paper included in the kit. 


STEP 8:
I adhere the 2 cards to the top as well as a tag from my stash. 


STEP 9:
I spray the “Winner” chippie included in the kit with Mister Huey’s Color Mist in the color Classic Tan. I love the aged vintage look I ended up with.


STEP 10:
I spray a button chippie (from my stash) with the same Classic Tan, and pop it up with some adhesive squares. I also used the gorgeous FabScraps double page of letters for the word “our”. These letters are part of the kit, and really go a long way!!!


STEP 11:
Using some of my very thin adhesive tape, I adhere some dark brown & white twine to the lid. I see Scrapbook Studio now stocks twine, yay!!! This is such a versatile product for cards and scrapping too!


I don’t often make gift boxes, but I am super happy with the way this turned out. It will be perfect as a gift box for that special young man in your life!!

There were so many yummy goodies included in this kit, if you would like to order it (or more info on the kit), email Scrapbook Studio at this address: sales@scrapbookstudio.co.za with September DT kit in the Subject Line.


Have a wonderful weekend!!!!!

Monday, October 8, 2012

"Friends" tutorial as promised!

Hi all, a very early morning post today. Hope you had a lovely weekend. Mine was just lovely, we had family with us, celebrating my Mom's 60th Birthday. I tried really hard to give her a special spoily weekend, cause she really is the best Mom in the world!

As promised I am back with my Friends tutorial. All product used in this tutorial is available from SCRAPBOOK STUDIO. Do yourself a favor and check out their shop!!!


STEP 1:
I decided to base this layout on one large focal photo. The idea for this came from the lovely large “Friends” rub-on that was included in the kit. I had just the photo to use, this one taken of my son and his classmates on their recent class tour. I decided not to change the colour of the photo to sepia this time, and work instead with the lovely bright colours in the photo. The main colours I chose to use are green red & blue.


STEP 2:
Once again I turned to my trusty (and well loved) Studio Calico Mr Huey Color Mists. I used the colour Real Red and used a Tim Holtz mask called “Compass”. I thought this mask was perfect to work with my travel themed layout! I purchased both of these items from Scrapbook Studio!


STEP 3:
I love my punches, and used this Knock-Outs Bracket punch by American Crafts to create a lovely subtle effect on the edge of the lovely red houndstooth patterned paper included in the kit. These punches are gorgeous and are also available from Scrapbook Studio!


STEP 4:
These Enmarc Crafts rub-ons were perfect to go around the edge of my photo, some of the wording was just right for the vibe I was trying to create on my layout. I have always been a bit weary of South African produced rub-on’s, but these went on like butter!!!


STEP 5:
As per my previous tutorials I used white embossing powder, which I heated and then inked some Tim Holtz Distress Ink in the colour Peeled Paint over the image. I then fussy cut around the edge of the cute little sun!


STEP 6:
I adhere some of the elements of my layout. I popped the sun up with some foam tape, it fit perfectly in the centre of the compass mask. 


STEP 7:
I used my Silhouette Cameo to cut some circles for my layout!


STEP 8:
For me, this is the most fun part of putting together a layout, adding all the bits and bobs. I ended up using some of the gorgeous FabScraps alphapbet stickers to add the words “dbn tour”, as well as another Enmarc rub-on. I cut some arrows with my Silhouette and attached them with my Tim Holtz Tiny Attacher. I purchased this mini stapler at Scrapbook Studio a while back, and I have got to say I LOVE this little thing, I used it on my layouts, all-the-time!! I see it’s still in stock at Scrapbook Studio!!!


And here it is, the end result, a fun bright and happy layout. I hope you have gained some ideas from my tutorial.

There were so many yummy goodies included in this kit, if you would like to order it (or more info on the kit), email Scrapbook Studio at this address: sales@scrapbookstudio.co.za with September DT kit in the Subject Line.

Wednesday, October 3, 2012

A 3rd layout for Scrapbook Studio

Hi all, welcome back to my blog this fine hot and sunny afternoon!!

Just a quick post, to share the latest layout I created with the September DT kit from Scrapbook Studio. There were so many yummy goodies included in this kit, if you would like to order it (or more info on the kit), email Scrapbook Studio at this address: sales@scrapbookstudio.co.za with September DT kit in the Subject Line.


I love this fun, happy and bright layout featuring a photo taken of my middle son Bryce on his school tour.

I will be back in the next day or two with the tutorial I put together for this layout!! See you soon!!

In the meantime, why not stop by the SCRAPBOOK STUDIO, and check out all their lovely stock!!!!! ;)

Tuesday, October 2, 2012

Sketch # 10 at Scrap Africa!!


Our latest sketch challenge is up and running, and after not scrapping too much while I have been sick, this one gave me the kick start I needed to get creative again!! Evgenia really creates the most gorgeous layouts for us to play with at SCRAP AFRICA.

Here is the layout I put together. I LOVE this photo of me and my eldest son together, taken in June of this year.


Some of the deets of products I used on this layout are:
Patterned Paper from the Awesome range by Simple Stories bought from ScrapBook Studio.
Mini Leafy Corner & Slide Mount both by Enmarc Crafts, find more details HERE (check out their latest products for October, they are gorgeous!!!).
Title cut with my Silhouette Cameo (still in LOVE with this amazing machine!!!)

And here is the lovely sketch:


And more wonderful news is: this time we have 2 sponsors!

FabScraps is the largest South African manufacturer and from now we will be lucky to have it as our permanent sponsor!


FabScraps  prize, Christmas pack of goodies:


And our second prize is the papers designed by our Special Guest Designer:


If you wish to buy these papers, you can contact Vika straight Viktoria Klabukova 
to get all the details:

We would REALLY LOVE for you to play along with us, I know there are loads of scrappy ladies out there, come and get in on the action, and join us at Scrap Africa!!!!

Smiles,

Monday, September 24, 2012

My 2nd Tutorial for Scrapbook Studio

No wonder I have been feeling grim!! I finally went to the doctor on Saturday, and he diagnosed me with bronchitis. I have been man down all weekend!!!!

So... hence the delay in getting this tutorial up. Better late than never I say. 

I hope my South African friends are all enjoying the long weekend, and have braaied up a storm today. My hubby braaied us some delicious meat, just what the doctor ordered ;)

So here is the second layout I created with the September kit from Scrapbook Studio. I am so happy with the way this one turned out!!


STEP 1:
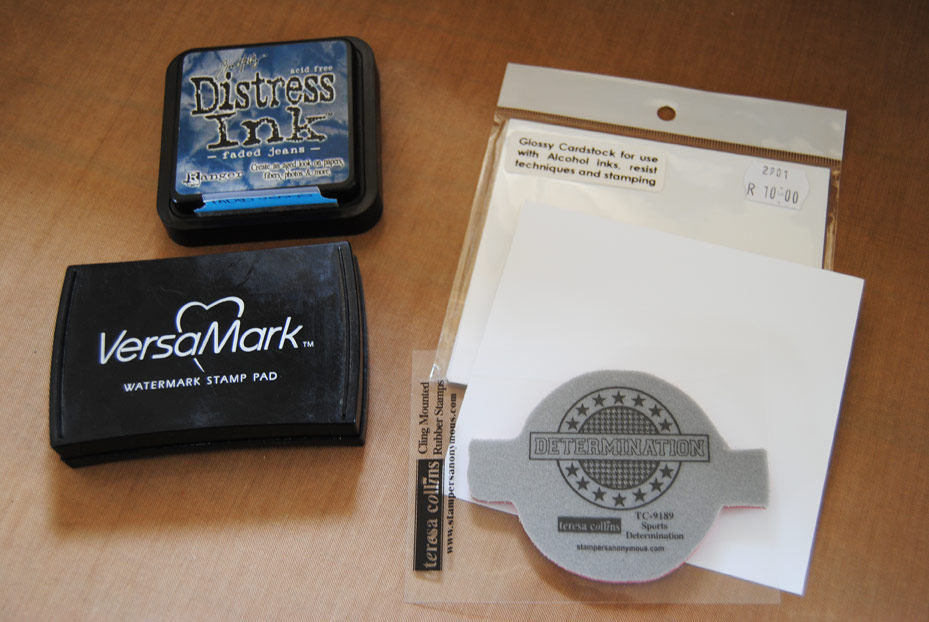
I gather all the elements I want to use on my page. In this instance I changed the color of my photos to black & white, as they didn’t match the patterned papers I want to use. I do this fairly often! I am doing a sports themed page, so I grabbed both the lovely “teresa collins” stamps included in the kit.


STEP 2:
I spray some Mister Huey’s Color Mist in the color Leaf Green onto a piece of cream cardstock, I like the effect of spraying mist onto plain cardstock, it gives it a bit of life!


STEP 3:
I decided to make some embellies from the stamps. I used some of the Glossy Cardstock that came with the kit. This is the first time I have embossed and used Tim Holtz distress ink with this cardstock, and it goes on like a dream!!


STEP 3:
I stamp the image with VersaMark ink, and then add white embossing powder. Here is the image before I have heated it.


Here is the image after I have heated it. I don’t have a fancy heating gun, so I just use my toaster to heat the image.


STEP 4:
Sponge some Distress Ink onto the image. I used the Tim Holtz Distress ink in the color “Faded Jeans”.


STEP 5:
Cut out the image. I followed the same procedure with the other “Teresa Collins” stamp in the kit. I plan to pop up both the stamped images with foam tape!


STEP 6:
I fiddle with my photos and other elements until I find a layout I am happy with. I cut out some of the lovely card images from the “Cheer ‘em on” paper from Webster’s Pages, using pieces with blue in them so I can add a little bit of blue to co-ordinate with the blue stamped images!! I use my Silhouette Cameo to cut out the word “athletics”, arrow and the stars. 


A side-on view so you can see how lovely the popped up embossed stamped embellies look on my layout!!


This really is the most wonderful kit, and I still have LOADS AND LOADS of product left after creating these last 2 pages. 

REMEMBER - This kit can be ordered by just e-mailing sales@scrapbookstudio.co.za with September DT kit in the Subject Line.

I will be back with another Scrapbook Studio tutorial soon!! 

Smiles,